
In this article, we will explore the detailed steps on how to wire a home theater system, ensuring you enjoy optimal sound and video quality in your entertainment space.
What Equipment Do You Need?
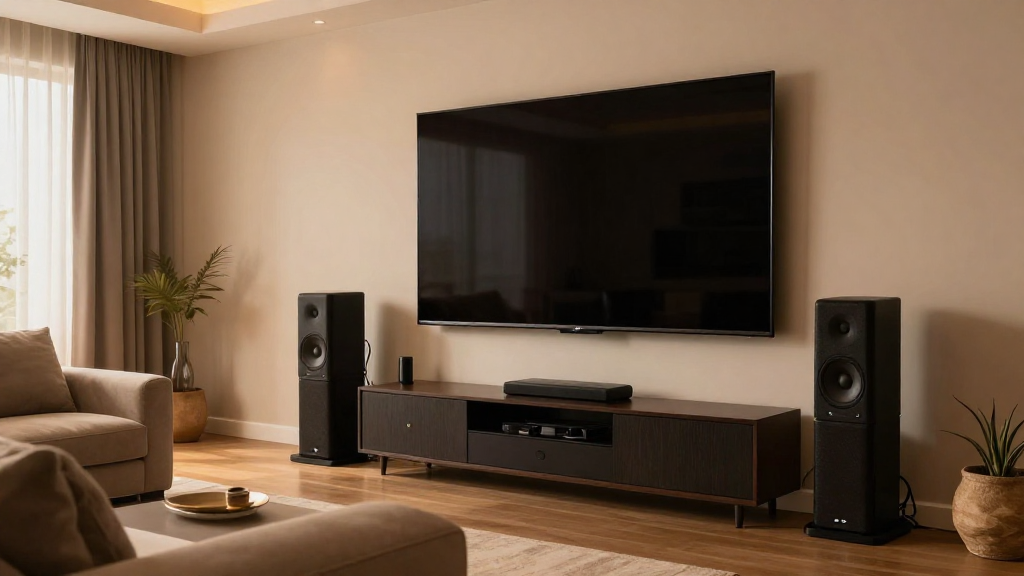
Before diving into the wiring process, it’s crucial to gather all the necessary equipment for setting up your home theater system. Here are the essential components:
- Receiver
- Speakers (front, surround, and subwoofer)
- HDMI cables
- Speaker wire
- TV or projector
Having the right equipment is the first step in **how to wire a home theater system** effectively. Each component plays a vital role in creating an immersive audio-visual experience.
Choosing the Right Receiver
The receiver is the heart of your home theater system. It connects all your devices and powers the speakers.
Look for a receiver that supports multiple HDMI inputs and audio formats like Dolby Atmos or DTS:X for an enhanced experience.
Additionally, consider the power output of the receiver to ensure it can adequately drive your speakers.
Types of Speakers to Consider
When wiring a home theater system, the choice of speakers is critical. You can opt for:
- Floor-standing speakers for more bass and volume
- Bookshelf speakers for a compact setup
- In-wall or in-ceiling speakers for a sleek look
Each type has its pros and cons, so select speakers that suit your room’s size and acoustics.
Connecting Your TV or Projector
Your TV or projector is the focal point of your home theater. Ensure it has enough HDMI ports to connect all your devices seamlessly.
Consider the distance from the receiver to the TV; using high-quality HDMI cables will ensure a reliable connection.
Also, keep in mind the placement of your projector to avoid shadows and optimize viewing angles.
How Do You Set Up Your Wiring?
Now that you have all the necessary equipment, it’s time to set up the wiring for your home theater system. Proper wiring is crucial for performance and safety.
Follow these steps to ensure a smooth setup:
- Plan your wiring layout.
- Measure distances for speaker wire and HDMI cables.
- Run the cables before placing speakers and furniture.
Following these steps will help you successfully wire your home theater system.
Planning Your Wiring Layout
Before you start connecting cables, plan the layout of your home theater. Determine where each speaker will be placed and how you will route the wires.
Consider the dimensions of your room and the optimal placement for surround sound. Use a diagram if necessary to visualize the layout.
Planning ahead will save you time and effort during the installation process.
Measuring Distances for Cables
Accurate measurements are essential when wiring a home theater system. Measure the distance from your receiver to each speaker and your TV or projector.
Allow some extra length for flexibility, but avoid excessive slack that can clutter your space. High-quality cables can impact sound and video quality, so choose wisely.
Using the right lengths will ensure a clean and organized setup.
Running the Cables
Once you have your layout and measurements, it’s time to run the cables. Start with the speaker wires, connecting them to the receiver first.
For a cleaner look, consider using cable management solutions like raceways or conduits to hide the wires along walls or ceilings.
Ensure all connections are secure to avoid any interruptions in audio or video quality.
How Do You Connect the Components?
After running the cables, the next step in how to wire a home theater system is connecting all components together. This is where it all comes together.
Follow these steps for a successful connection:
- Connect the speakers to the receiver.
- Attach the receiver to your TV or projector.
- Connect other devices like Blu-ray players or game consoles.
These connections are critical for achieving a functional home theater system.
Connecting Speakers to the Receiver
Begin by connecting each speaker to the corresponding terminals on the receiver. Pay attention to the polarity; positive and negative connections are crucial for proper sound.
Use color-coded speaker wires to simplify this process and ensure the correct connections.
Double-check each connection before powering on the system to avoid damage.
Linking the Receiver to Your Display Device
Next, use an HDMI cable to connect your receiver to the TV or projector. This connection will carry both audio and video signals.
Make sure to plug into the correct HDMI input on your display device to access the receiver’s features.
Some receivers may have specific HDMI ports for enhanced 4K or HDR support, so refer to the receiver’s manual for guidance.
Connecting Additional Devices
Finally, connect any additional devices like Blu-ray players, gaming consoles, or streaming devices to the receiver using HDMI cables.
Organize these connections for easy access and troubleshooting. Labeling each cable can save time in the future.
Once all components are connected, you can proceed to configure your system settings.
How Do You Configure Your Home Theater System?
After wiring and connecting all components, it’s time to configure your home theater system for the best performance. Configuration is key to maximizing your setup.
Follow these steps to optimize your system:
- Set up the receiver’s audio settings.
- Adjust video settings for your display.
- Run an audio calibration if available.
These configurations will enhance your home theater experience significantly.
Audio Settings on the Receiver
Access the receiver’s audio settings to configure speaker sizes, distances, and levels. This ensures optimal performance based on your room’s acoustics.
Consider enabling any surround sound features your receiver may offer for an immersive experience.
Take the time to fine-tune these settings for the best audio quality.
Video Settings for Your Display
Adjust the video settings on your TV or projector to match the capabilities of your receiver and source devices.
Settings such as resolution, aspect ratio, and HDR options can impact the viewing experience.
Refer to your device manuals for specific recommendations based on your setup.
Running Audio Calibration
If your receiver has an automatic audio calibration feature, use it to set the optimal levels and equalization for your speakers.
This process typically involves placing a calibration microphone in your seating area to measure sound quality.
Running this feature can save you time and significantly enhance your overall audio experience.
What Troubleshooting Tips Should You Know?
Even with a well-planned setup, you may encounter issues when wiring a home theater system. Understanding common troubleshooting tips can help you resolve problems efficiently.
Here are some common issues and solutions:
- Check for loose connections.
- Test cables for damage.
- Ensure settings are correctly configured.
These tips can help identify and fix problems quickly.
Identifying Loose Connections
If you’re experiencing audio or video issues, the first step is to check for loose connections. Ensure all cables are securely plugged into their respective ports.
Re-seat each connection to eliminate any possibility of a poor connection causing the problem.
A thorough inspection can often resolve simple issues.
Testing for Cable Damage
Inspect your HDMI and speaker cables for any visible signs of damage, such as fraying or kinks. Damaged cables can lead to poor performance or complete signal loss.
If you suspect a cable is faulty, replace it with a new one to see if the issue resolves.
Using high-quality cables can also minimize future problems.
Verifying Configuration Settings
Sometimes the problem may lie in the configuration settings of your receiver or display device. Review the settings to ensure everything is correctly set up.
Refer to the user manuals for detailed guidance on optimizing your system.
If all else fails, consider resetting your receiver to factory settings and reconfiguring from scratch.
Conclusion
Wiring a home theater system may seem daunting, but by following the outlined steps, you can create a stunning audio-visual environment. Start by gathering the necessary equipment, plan your layout, and connect everything properly. With some configuration and troubleshooting tips, you’ll be well on your way to enjoying your favorite movies and music in high quality.